This lesson teaches you to
- Set up for Geofence Monitoring
- Create and Add Geofences
- Handle Geofence Transitions
- Stop Geofence Monitoring
- Use Best Practices for Geofencing
- Troubleshoot the Geofence Entrance Event
You should also read
Try it out
Geofencing combines awareness of the user's current location with awareness of the user's proximity to locations that may be of interest. To mark a location of interest, you specify its latitude and longitude. To adjust the proximity for the location, you add a radius. The latitude, longitude, and radius define a geofence, creating a circular area, or fence, around the location of interest.
You can have multiple active geofences, with a limit of 100 per device user. For each geofence, you can ask Location Services to send you entrance and exit events, or you can specify a duration within the geofence area to wait, or dwell, before triggering an event. You can limit the duration of any geofence by specifying an expiration duration in milliseconds. After the geofence expires, Location Services automatically removes it.
This lesson shows you how to add and remove geofences, and then listen for geofence transitions
using an IntentService.
We recommend upgrading existing apps to use the LocationServices class, which contains the GeofencingApi interface. The LocationServices class replaces the LocationClient (deprecated).
Set up for Geofence Monitoring
The first step in requesting geofence monitoring is to request the necessary permission.
To use geofencing, your app must request
ACCESS_FINE_LOCATION. To request this
permission, add the following element as a child element of the
<manifest>
element in your app manifest:
<uses-permission android:name="android.permission.ACCESS_FINE_LOCATION"/>
If you want to use an IntentService to listen for geofence transitions,
add an element specifying the service name. This element must be
a child of the
<application> element:
<application
   android:allowBackup="true">
   ...
   <service android:name=".GeofenceTransitionsIntentService"/>
<application/>
To access the location APIs, you need to create an instance of the Google Play services API client. To learn how to connect your client, see Connect to Google Play Services.
Create and Add Geofences
Your app needs to create and add geofences using the location API's builder class for
creating Geofence objects, and the convenience class for adding them. Also, to handle the
intents sent from Location Services when geofence transitions occur, you can define a
PendingIntent as shown in this section.
Note: On single-user devices, there is a limit of 100 geofences per app. For multi-user devices, the limit is 100 geofences per app per device user.
Create geofence objects
First, use
Geofence.Builder to create a geofence, setting the desired radius, duration, and
transition types for the geofence. For example, to populate a list object named
mGeofenceList:
mGeofenceList.add(new Geofence.Builder()
    // Set the request ID of the geofence. This is a string to identify this
    // geofence.
    .setRequestId(entry.getKey())

    .setCircularRegion(
            entry.getValue().latitude,
            entry.getValue().longitude,
            Constants.GEOFENCE_RADIUS_IN_METERS
    )
    .setExpirationDuration(Constants.GEOFENCE_EXPIRATION_IN_MILLISECONDS)
    .setTransitionTypes(Geofence.GEOFENCE_TRANSITION_ENTER |
            Geofence.GEOFENCE_TRANSITION_EXIT)
    .build());
This example pulls data from a constants file. In actual practice, apps might dynamically create geofences based on the user's location.
Specify geofences and initial triggers
The following snippet uses the
GeofencingRequest class
and its nested
GeofencingRequestBuilder class to
specify the geofences to monitor and to set how related geofence events are triggered:
private GeofencingRequest getGeofencingRequest() {
    GeofencingRequest.Builder builder = new GeofencingRequest.Builder();
    builder.setInitialTrigger(GeofencingRequest.INITIAL_TRIGGER_ENTER);
    builder.addGeofences(mGeofenceList);
    return builder.build();
}
This example shows the use of two geofence triggers. The
GEOFENCE_TRANSITION_ENTER
transition triggers when a device enters a geofence, and the
GEOFENCE_TRANSITION_EXIT
transition triggers when a device exits a geofence. Specifying
INITIAL_TRIGGER_ENTER tells Location services that
GEOFENCE_TRANSITION_ENTER
should be triggered if the the device is already inside the geofence.
In many cases, it may be preferable to use instead
INITIAL_TRIGGER_DWELL,
which triggers events only when the user stops for a defined duration within a geofence.
This approach can help reduce "alert spam" resulting from large numbers notifications when a
device briefly enters and exits geofences. Another strategy for getting best results from your
geofences is to set a minimum radius of 100 meters. This helps account for the location accuracy
of typical Wi-Fi networks, and also helps reduce device power consumption.
Define an Intent for geofence transitions
The Intent sent from Location Services can trigger various actions in
your app, but you should not have it start an activity or fragment, because components
should only become visible in response to a user action. In many cases, an
IntentService is a good way to handle the intent. An
IntentService can post a notification, do long-running background work,
send intents to other services, or send a broadcast intent. The following snippet shows how
to define a PendingIntent that starts an IntentService:
public class MainActivity extends FragmentActivity {
    ...
    private PendingIntent getGeofencePendingIntent() {
        // Reuse the PendingIntent if we already have it.
        if (mGeofencePendingIntent != null) {
            return mGeofencePendingIntent;
        }
        Intent intent = new Intent(this, GeofenceTransitionsIntentService.class);
        // We use FLAG_UPDATE_CURRENT so that we get the same pending intent back when
        // calling addGeofences() and removeGeofences().
        return PendingIntent.getService(this, 0, intent, PendingIntent.
                FLAG_UPDATE_CURRENT);
    }
Add geofences
To add geofences, use the
method.
Provide the Google API client, the GeoencingApi.addGeofences()
GeofencingRequest object, and the PendingIntent.
The following snippet, which processes the results in
onResult(), assumes that the main activity implements
ResultCallback:
public class MainActivity extends FragmentActivity {
    ...
    LocationServices.GeofencingApi.addGeofences(
                mGoogleApiClient,
                getGeofencingRequest(),
                getGeofencePendingIntent()
        ).setResultCallback(this);
Handle Geofence Transitions
When Location Services detects that the user has entered or exited a geofence, it
sends out the Intent contained in the PendingIntent
you included in the request to add geofences. This Intent is received
by a service like GeofenceTransitionsIntentService,
which obtains the geofencing event from the intent, determines the type of Geofence transition(s),
and determines which of the defined geofences was triggered. It then sends a notification as
the output.
The following snippet shows how to define an IntentService that posts a
notification when a geofence transition occurs. When the user clicks the notification, the
app's main activity appears:
public class GeofenceTransitionsIntentService extends IntentService {
   ...
    protected void onHandleIntent(Intent intent) {
        GeofencingEvent geofencingEvent = GeofencingEvent.fromIntent(intent);
        if (geofencingEvent.hasError()) {
            String errorMessage = GeofenceErrorMessages.getErrorString(this,
                    geofencingEvent.getErrorCode());
            Log.e(TAG, errorMessage);
            return;
        }

        // Get the transition type.
        int geofenceTransition = geofencingEvent.getGeofenceTransition();

        // Test that the reported transition was of interest.
        if (geofenceTransition == Geofence.GEOFENCE_TRANSITION_ENTER ||
                geofenceTransition == Geofence.GEOFENCE_TRANSITION_EXIT) {

            // Get the geofences that were triggered. A single event can trigger
            // multiple geofences.
            List triggeringGeofences = geofencingEvent.getTriggeringGeofences();

            // Get the transition details as a String.
            String geofenceTransitionDetails = getGeofenceTransitionDetails(
                    this,
                    geofenceTransition,
                    triggeringGeofences
            );

            // Send notification and log the transition details.
            sendNotification(geofenceTransitionDetails);
            Log.i(TAG, geofenceTransitionDetails);
        } else {
            // Log the error.
            Log.e(TAG, getString(R.string.geofence_transition_invalid_type,
                    geofenceTransition));
        }
    }
After detecting the transition event via the PendingIntent,
this IntentService gets the geofence transition type and tests whether
it is one of the events the app uses to trigger notifications -- either
GEOFENCE_TRANSITION_ENTER
or GEOFENCE_TRANSITION_EXIT
in this case. The service then sends a notification and logs the transition details.
Stop Geofence Monitoring
Stopping geofence monitoring when it is no longer needed or desired can help save battery
power and CPU cycles on the device. You can stop geofence monitoring
in the main activity used to add and remove geofences; removing a geofence stops it
immediately. The API provides methods to
remove geofences either by request IDs, or by removing geofences associated with a given
PendingIntent.
The following snippet removes geofences by PendingIntent, stopping all
further notification when the device enters or exits previously added geofences:
LocationServices.GeofencingApi.removeGeofences(
            mGoogleApiClient,
            // This is the same pending intent that was used in addGeofences().
            getGeofencePendingIntent()
    ).setResultCallback(this); // Result processed in onResult().
}
You can combine geofencing with other location-aware features, such as periodic location updates. For more information, see the other lessons in this class.
Use Best Practices for Geofencing
This section outlines recommendations for using geofencing with the location APIs for Android.
Reduce power consumption
You can use the following techniques to optimize power consumption in your apps that use geofencing:
Set the notification responsiveness to a higher value. Doing so improves power consumption by increasing the latency of geofence alerts. For example, if you set a responsiveness value of five minutes your app only checks for an entrance or exit alert once every five minutes. Setting lower values does not necessarily mean that users will be notified within that time period (for example, if you set a value of 5 seconds it may take a bit longer than that to receive the alert).
Use a larger geofence radius for locations where a user spends a significant amount of time, such as home or work. While a larger radius doesn't directly reduce power consumption, it reduces the frequency at which the app checks for entrance or exit, effectively lowering overall power consumption.
Choose the optimal radius for your geofence
For best results, the minimium radius of the geofence should be set between 100 - 150 meters. When Wi-Fi is available location accuracy is usually between 20 - 50 meters. When indoor location is available, the accuracy range can be as small as 5 meters. Unless you know indoor location is available inside the geofence, assume that Wi-Fi location accuracy is about 50 meters.
When Wi-Fi location is not available (for example, when you are driving in rural areas) the location accuracy degrades. The accuracy range can be as large as several hundred meters to several kilometers. In cases like this, you should create geofences using a larger radius.
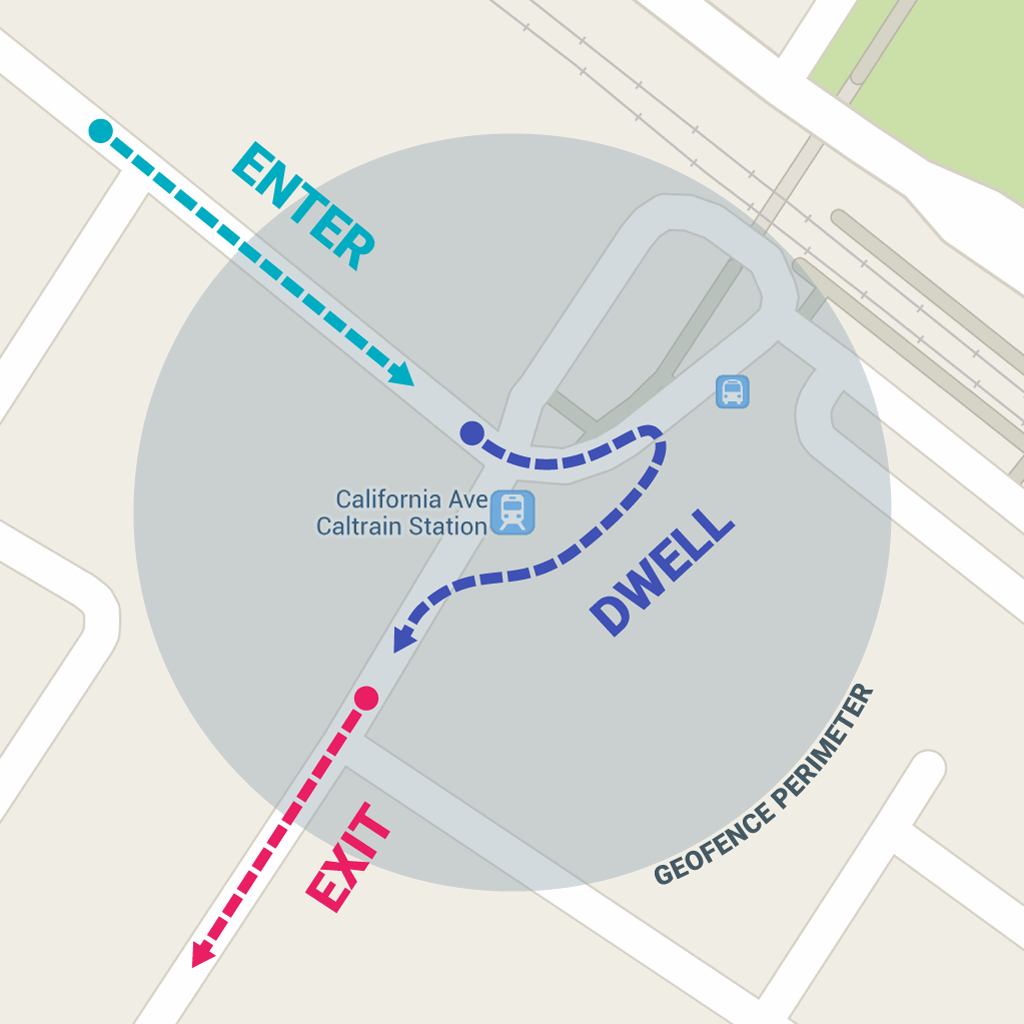
Use the dwell transition type to reduce alert spam
If you receive a large number of alerts when driving briefly past a geofence, the best way to
reduce the alerts is to use a transition type of
GEOFENCE_TRANSITION_DWELL instead of
GEOFENCE_TRANSITION_ENTER. This way, the dwelling alert is sent only when the user stops
inside a geofence for a given period of time. You can choose the duration by setting a
loitering delay.
Re-register geofences only when required
Registered geofences are kept in the com.google.process.location process owned by
the com.google.android.gms package.
The app doesn’t need to do anything to handle the following events, because the system
restores geofences after these events:
- Google Play services is upgraded.
- Google Play services is killed and restarted by the system due resource restriction.
- The location process crashes.
The app must re-register geofences if they're still needed after the following events, since the system cannot recover the geofences in the following cases:
- The device is rebooted. The app should listen for the device's boot complete action, and then re- register the geofences required.
- The app is uninstalled and re-installed.
- The app's data is cleared.
- Google Play services data is cleared.
- The app has received a
GEOFENCE_NOT_AVAILABLEalert. This typically happens after NLP (Android's Network Location Provider) is disabled.
Troubleshoot the Geofence Entrance Event
If geofences are not being triggered when the device enters a geofence
(the
GEOFENCE_TRANSITION_ENTER alert isn’t triggered), first ensure that your geofences are
registered properly as described in this guide.
Here are some possible reasons for alerts not working as expected:
- Accurate location is not available inside your geofence or your geofence is too
small. On most devices, the geofence service uses only network location for geofence
triggering. The service uses this approach because network location consumes much less
power, it takes less time to get discrete locations, and most importantly it’s available indoors.
Starting with Google Play services 3.2, the geofence service calculates the overlapping ratio of
the location circle and the geofence circle and only generates the entrance alert when the ratio
is at least 85% for a bigger geofence or 75% for a smaller geofence. For an exit alert, the ratio
threshold used is 15% or 25%. Any ratio between these thresholds makes the geofence service mark
the geofence state as
INSIDE_LOW_CONFIDENCEorOUTSIDE_LOW_CONFIDENCEand no alert is sent. - Wi-Fi is turned off on the device. Having Wi-Fi on can significantly improve the location accuracy, so if Wi-Fi is turned off, your application might never get geofence alerts depending on several settings including the radius of the geofence, the device model, or the Android version. Starting from Android 4.3 (API level 18), we added the capability of “Wi-Fi scan only mode” which allows users to disable Wi-Fi but still get good network location. It’s good practice to prompt the user and provide a shortcut for the user to enable Wi-Fi or Wi-Fi scan only mode if both of them are disabled. Use SettingsApi to ensure that the device's system settings are properly configured for optimal location detection.
- There is no reliable network connectivity inside your geofence. If there is no reliable data connection, alerts might not be generated. This is because the geofence service depends on the network location provider which in turn requires a data connection.
- Alerts can be late. The geofence service does not continuously query for location, so expect some latency when receiving alerts. Usually the latency is less than 2 minutes, even less when the device has been moving. If the device has been stationary for a significant period of time, the latency may increase (up to 6 minutes).