Dependencies and Prerequisites
- Android 5.0 (API level 21) or higher
- Android Auto companion app installed
In this document
Testing your Auto app ensures that users do not encounter unexpected results or have a poor experience when interacting with your apps. Android now provides Desktop Head Unit (DHU), a testing tool for Auto apps that lets you test pre-released versions of your Android Auto apps without having to work from your car.
The Desktop Head Unit (DHU) enables your development machine to emulate an Android Auto head unit, so you can easily run and test Android Auto apps. The DHU runs on Windows, Mac, and Linux hosts and replaces previous Android Auto simulators, such as the Android Media Browser and Messaging simulators.
Note: It's important that you test your auto app for the criteria listed on Auto app quality page prior to submitting to Google Play for review.
This lesson teaches you how to install and run the DHU on your development machine for testing your apps. Once you’ve installed the DHU, you can test your Android Auto apps by connecting your phone and workstation via USB.
Installing the DHU
Follow these steps to install the DHU on your development machine:
<sdk>/extras/google/auto/
directory.$ sudo apt-get install libsdl2-2.0-0 libsdl2-ttf-2.0-0 libportaudio2 libpng12-0
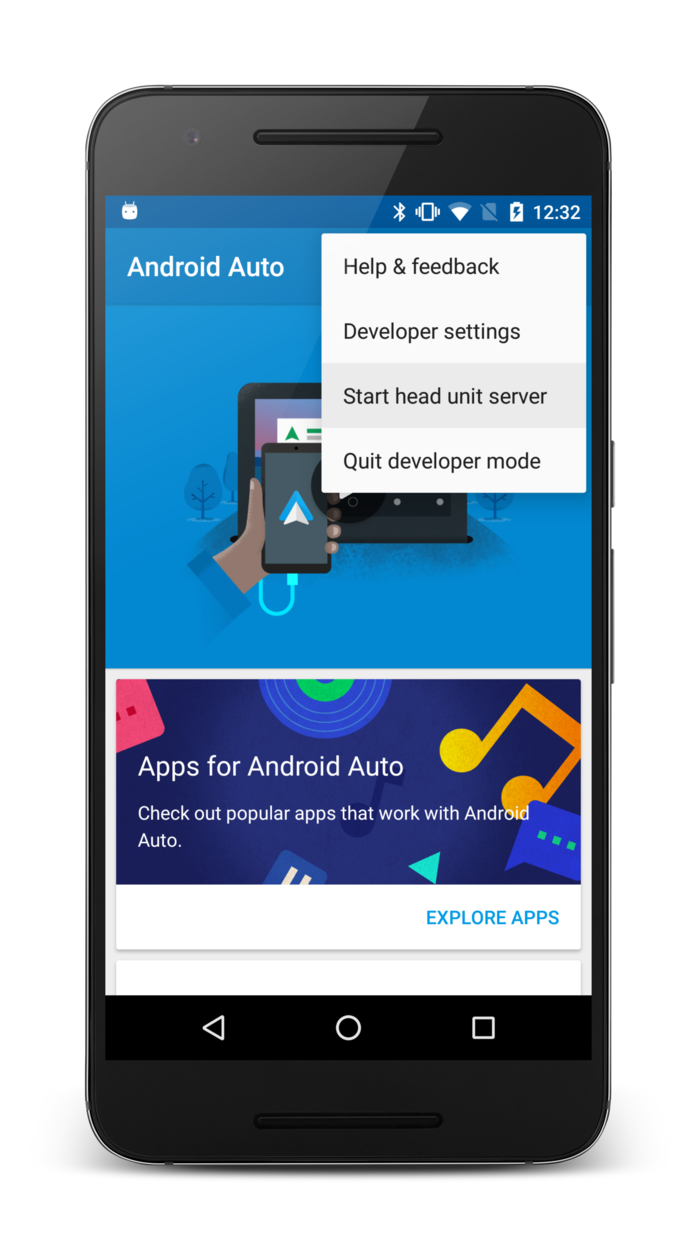
Figure 1. Context menu with developer options.
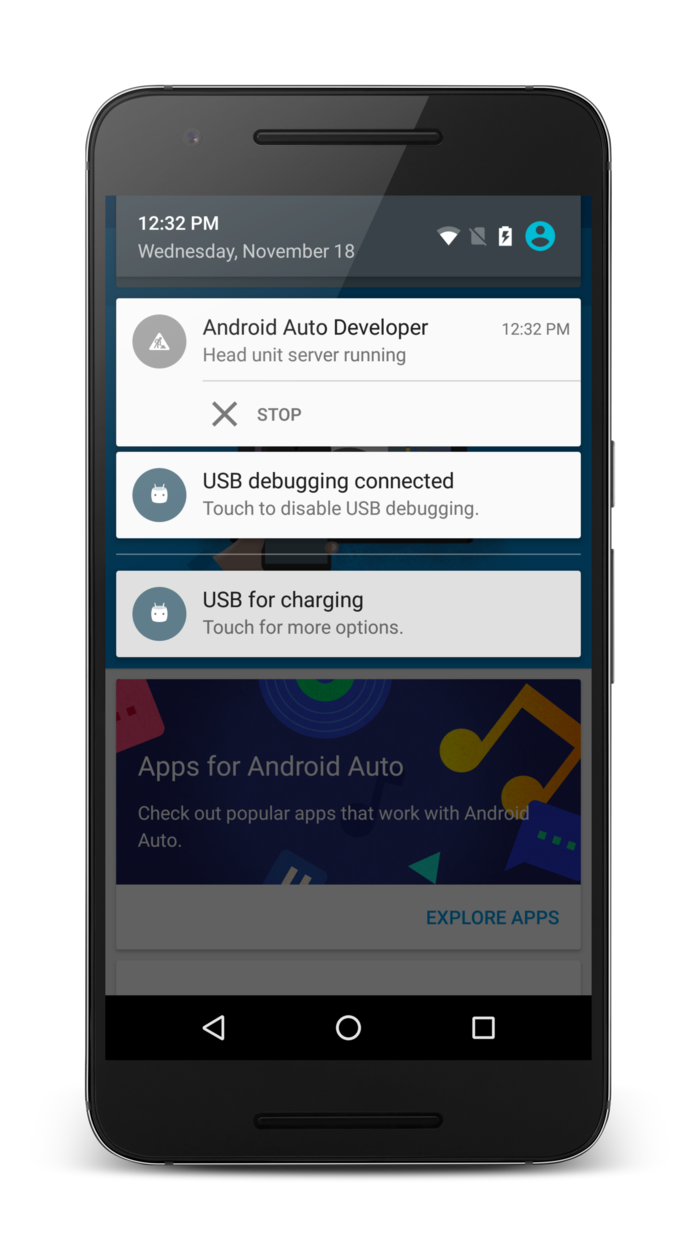
Figure 2. Notification that the head unit server is running.
Running the DHU
Run the DHU by connecting your mobile device to a development machine and setting up a connection to the head unit server over Android Debug Bridge (ADB). Follow these steps to set up tunneling and start the DHU:
- On the mobile device, enable Android Auto developer mode by starting the Android Auto companion app, and then tapping the Android Auto toolbar title 10 times. This step is only required the first time you run the companion app.
- If the server is not already running, select Start head unit server
from the Android Auto menu.
On the device, a foreground service appears in the notification area.
- In the Android Auto app, make sure the Only connect to known cars option is disabled.
- Connect the mobile device to the development machine via USB.
- Make sure the mobile device has its screen unlocked, otherwise it cannot launch the DHU.
- On the development machine, run the following
adbcommand to forward socket connections from the development machine's port 5277 to the same port number on the Android device. This configuration allows the DHU to connect to the head unit server running on your phone over a TCP socket.$ adb forward tcp:5277 tcp:5277
- Start the DHU by running the command
desktop-head-unit.exe(on Windows) or./desktop-head-unit(on Mac or Linux) from the<sdk>/extras/google/auto/directory.$ cd <sdk>/extras/google/auto $ ./desktop-head-unit
By default, the head unit server connects over port 5277. To override the host or port (for example, to forward over SSH), use the
desktop-head-unit --adb <[localhost:]port>flag, as in the following example:$ ./desktop-head-unit --adb 5999
By default, the DHU emulates the most common form of Android Auto-compatible head unit, which uses a touch screen user interface. You can simulate user touches by clicking the DHU with a mouse. To emulate head units which use a rotary controller for input, you can use the
-i controllerflag, as in this example:$ ./desktop-head-unit -i controller
When the DHU is in rotary-controller mode you can simulate controller operations by using keyboard shortcuts, as described in DHU commands and key bindings. If the DHU is in rotary controller mode, it ignores mouse clicks; you must operate Android Auto with the simulated rotary controller operations.
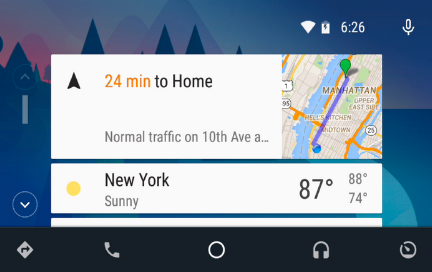
Figure 4. DHU launches on the development machine.
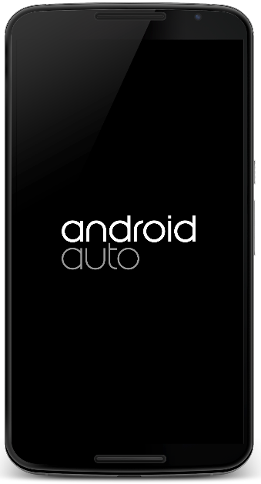
Figure 3. Android Auto launches on the mobile device.
After you set up and start the DHU, you can run DHU commands from the command line to run and test your app from the terminal. You can also run these commands by using keyboard shortcuts.
Issuing DHU Commands
DHU commands allow you to test your app with Android Auto features, such as playing voice input or switching between night and day display mode. You can issue commands to the DHU by running commands from the terminal window where you launched DHU. You can also issue commands by selecting the DHU window and using keyboard shortcuts. The DHU commands and key bindings for all controls are listed in DHU commands and key bindings.
Switching between day and night mode
Android Auto supports different color schemes for day and night. You should test your app in both day and night mode. You can switch between night and day mode in either of the following ways:
- Run the command
daynightin the terminal where you launched the DHU. - Select the DHU window and press the N key.
Microphone testing
The DHU supports using a microphone for voice input. You can also instruct the DHU to treat a pre-recorded voice track as input, as if the DHU had heard the track through the microphone.
To use a pre-recorded sound file as input, enter this command:
$ mic play <sound_file_path>/<sound_file>.wav
For your convenience, we have provided the following sound files for common
voice commands. These sound files are installed in the
<sdk>/extras/google/auto/voice/ directory.
-
exitnav.wav - "Exit navigation."
-
navgoogle.wav - "Navigate to 1600 Amphitheatre Parkway, Mountain View."
-
navsoh.wav - "Navigate to Sydney Opera House."
-
nextturn.wav - "When is my next turn?"
-
showalternateroute.wav - "Show alternate routes.""
-
howlong.wav - "How long until I get there?"
-
navhome.wav - "Navigate to home."
-
navwork.wav - "Navigate to work.""
-
pause.wav - "Pause music."
-
showtraffic.wav - "Show traffic."
DHU commands and key bindings
The DHU supports the following commands.
Table 1. Commands and key bindings
| Category | Command | Subcommand | Argument(s) | Keyboard Shortcut(s) | Description |
|---|---|---|---|---|---|
| System | help | [command] | Shows the full command set. Specifying a command name (for example, help day)
causes the system to show help for that command. |
||
| quit | Alt+q | Quits the head unit. | |||
| sleep | [seconds] | Sleeps for one second. Specifying an argument (for example, sleep 30) causes the
system to sleep the specified number of seconds. This command
is useful if you are writing scripts for the DHU. (You can run a script by using I/O redirection
from the command line: ./desktop-head-unit < script.txt loads commands from the
file script.txt.) |
|||
| screenshot | filename.png | Saves a screenshot to filename.png. |
|||
| Microphone | mic | begin | m | Activates the microphone (equivalent to clicking the steering wheel's microphone button) and waits for input from the computer microphone. | |
| play | filename.wav | Causes the DHU to treat filename.wav as voice input, as if it had heard that sound
through the microphone. You do not hear the sound file being played, but you do hear
the response from Android Auto. |
|||
| repeat | Repeats the last mic play command, as if you had called mic play
again with the same sound file parameter. |
||||
| Input | dpad | up down left right |
Arrow keys | Simulates moving the rotary controller. | |
| soft left soft right |
Shift+Arrow keys | Simulates pressing the side buttons available on some rotary controllers. | |||
| click | Return | Simulates pressing the rotary controller. | |||
| back | Backspace | Simulates pressing the back button available below some rotary controllers. | |||
| rotate left rotate right |
1 2 |
Simulates rotating the rotary controller left (counter-clockwise) or right (clockwise). | |||
| flick left flick right |
Shift+1 Shift+2 |
Simulates a fast spin of the rotary controller to the left (counter-clockwise) or right (clockwise). | |||
| tap | x y | Simulates a touch event at the specified coordinates. For example, tap 50 100 |
|||
| Day/Night | day | Shift+n | Activates day mode (high brightness, full color). | ||
| night | Ctrl+n | Activates night mode (low brightness, high contrast). | |||
| daynight | n | Toggles current day/night mode. |
Media Browser and Messaging Simulators
Important: Use of the Android Media Browser and Messaging Simulators for testing Android Auto apps is deprecated. Instead, we recommend using the Desktop Head Unit, which enables your development machine to act as if it were an Android Auto head unit.
To get the simulators, open the SDK Manager and download them from Extras > Android Auto API Simulators.
Before you begin testing, compile your app in your development environment. Install your app and the Android simulator for the features you want to test (that is, audio or messaging) on a physical or virtual device running Android 5.0 (API level 21) or higher. To check the version of Android on the device, go to Settings > About phone (or About tablet) > Android Version.
Testing audio apps
To run and test audio apps:
- Install the Android Media Browser simulator
(
<sdk>/extras/google/simulators/media-browser-simulator.apk) on the test device. You can do this using the adb command line tool. - Enable developer options on the test device.
- Install your app on the test device.
- Launch the Android Media Browser simulator to see how your audio app appears in Auto. If your app does not appear, stop the simulator from Settings > Apps and restart it.
Testing messaging apps
To run and test messaging apps:
- Install the Android Messaging simulator
(
<sdk>/extras/google/simulators/messaging-simulator.apk) on the test device. You can do this using the adb command line tool. - Enable the simulator to read notifications posted on the system:
- Enable developer options on the test device.
- Click Settings > Sounds & Notifications > Notification Access and check the box labeled Messaging Simulator.
- Install your app on the test device.
- Launch the Android Messaging Simulator to see how your messaging app appears in Auto. If your app does not appear, stop the simulator from Settings > Apps and restart it.